Before installing a new GPU, it’s crucial to uninstall the existing graphics drivers. This will prevent software conflicts and ensure a smooth installation process.
Upgrading your graphics card can significantly improve your system’s performance and enable you to run more demanding applications and games. However, it’s essential to follow the proper procedures to avoid any potential issues. Uninstalling the old graphics drivers before installing the new GPU is a necessary step to ensure compatibility and optimal performance.
We’ll explore the importance of removing the old drivers, the steps to uninstall them, and the benefits of doing so. By following these guidelines, you can seamlessly transition to your new GPU without any complications.
Why Uninstalling Graphics Drivers Is Important
Uninstalling graphics drivers before installing a new GPU is essential to ensure smooth installation and optimal performance. This step is often overlooked, but it plays a crucial role in preventing driver conflicts, ensuring proper driver installation, and maximizing the new GPU’s capabilities. By understanding the importance of uninstalling graphics drivers, you can avoid potential issues and experience seamless GPU upgrades.
Avoid Driver Conflicts
Uninstalling the existing graphics drivers helps prevent conflicts between the old and new drivers. When incompatible drivers coexist, they can create stability issues, performance degradation, and system crashes. By removing the old drivers, you eliminate the risk of conflicting software components that can interfere with the installation and operation of the new GPU.
Ensure Proper Driver Installation
Uninstalling the graphics drivers before installing a new GPU ensures that the system starts with a clean slate. This paves the way for the proper installation of the new GPU’s drivers, minimizing the likelihood of errors or incompatibility issues. A clean driver installation provides a stable foundation for the new graphics card to function optimally and leverage its full potential.
Step-by-step Guide To Uninstall Graphics Drivers
When installing a new GPU, it’s crucial to start with a clean slate by uninstalling the existing graphics drivers. Doing so can prevent potential conflicts and ensure a smooth installation process. In this step-by-step guide, we’ll walk you through the process of uninstalling graphics drivers to prepare for your new GPU.
Backup Your Graphics Settings
Before you commence the driver uninstallation process, it’s wise to back up your current graphics settings to ensure you can restore them if needed. To do this, make a note or take screenshots of your current graphics settings, including resolution, refresh rate, and any custom color profiles.
Uninstalling Graphics Drivers
The first step in uninstalling your graphics drivers is to access the Device Manager. Right-click on the Start button, and select “Device Manager.” Locate the “Display adapters” category and expand it. Right-click on your graphics card and select “Uninstall device.” Follow the on-screen prompts to complete the uninstallation process.
Removing Remaining Driver Files
Even after uninstalling the graphics drivers, some residual files may remain on your system. These files can potentially interfere with the installation of your new GPU. To ensure a clean slate, use a driver removal tool or software to thoroughly remove any remaining driver files from your system. Be sure to restart your computer after completing this process to fully clear out any remaining traces of the old drivers.
Best Practices For Installing A New Gpu
When it comes to upgrading your graphics card, following best practices is essential for a smooth and successful installation. In this guide, we will walk you through the steps you need to take before, during, and after the installation process.
Research Compatibility
Before getting started, it is crucial to research and ensure that the new GPU you plan to install is compatible with your system. This involves checking the manufacturer’s website for the minimum system requirements and compatibility information.
If you are unsure about the compatibility of your motherboard, power supply, or other components, look for online forums or communities where experienced users can help answer your questions. Remember, investing time in research now will save you from any potential compatibility issues in the future.
Preparing Your System
Preparing your system for a new GPU involves a few key steps to ensure a seamless installation process. Here are some best practices to consider:
- Start by backing up your important files and data. This will safeguard your information in case any unexpected issues arise during the installation.
- Uninstall the current graphics drivers: Before installing a new GPU, it is crucial to uninstall the existing graphics drivers from your system. This helps to avoid any conflicts or issues that may arise.
- Power off and disconnect your system: Shut down your computer and unplug it from the power source. This prevents any electrical damage and ensures your safety during the installation process.
- Clean the GPU slot: Use compressed air or a soft brush to remove dust or debris from the PCI Express slot where the new graphics card will be installed. A clean slot helps to establish a secure connection.
Installing The New Gpu
Now that you have completed the necessary preparations, it is time to install your new GPU. Here’s what you need to do:
- Insert the GPU into the appropriate slot: Carefully align the GPU with the PCI Express slot on your motherboard and firmly push it down until it is properly seated. Ensure that any securing mechanisms on the slot are engaged to keep the GPU securely in place.
- Connect power cables: Depending on the power requirements of your GPU, you may need to connect additional power cables from your power supply to the GPU. Consult the manufacturer’s documentation for specific instructions.
- Secure the GPU: Double-check that the GPU is securely fastened in place and all connections are secure. This will help prevent any issues resulting from loose connections.
- Install the latest drivers: Once the hardware is installed, download and install the latest drivers for your new GPU from the manufacturer’s website. This ensures optimal performance and compatibility with your system.
- Restart your system: After installing the drivers, restart your computer to complete the installation process. This allows the system to recognize the new GPU and apply the necessary configurations.
Following these best practices will help you avoid any potential issues and ensure a smooth installation process for your new GPU. Enjoy your enhanced graphics performance!

Credit: www.avast.com
Common Mistakes To Avoid
When upgrading your GPU, it is crucial to follow the correct steps to ensure a smooth installation process. Avoiding common mistakes can save you from unnecessary hassles and potential system glitches. In this article, we will discuss two common errors that people make when installing a new graphics card: Skipping Driver Uninstallation and Neglecting Compatibility Testing. Let’s take a closer look at each of these mistakes and how you can avoid them.
Skipping Driver Uninstallation:
One of the most common mistakes people make when installing a new GPU is neglecting to uninstall their old graphics drivers. This oversight can lead to conflicts and erratic behavior in your system. Uninstalling your current drivers provides a clean slate for the new GPU’s drivers to work effectively. Skipping this step may result in performance issues or even system crashes.
To avoid this mistake, follow these step-by-step instructions:
- Step 1: Open the Control Panel.
- Step 2: Click on “Uninstall a program” under the Programs section.
- Step 3: Locate your graphics driver from the list of installed programs.
- Step 4: Right-click on the driver and select “Uninstall.”
- Step 5: Follow the on-screen prompts to complete the uninstallation process.
By following these steps, you ensure that your old graphics drivers are removed completely before installing the new GPU. This will help prevent any conflicts and ensure that your new graphics card functions optimally.
Neglecting Compatibility Testing:
Another mistake to avoid is neglecting to test the compatibility between your chosen graphics card and your system’s hardware and software. Failing to carry out compatibility testing can lead to compatibility issues and poor performance.
To avoid this mistake, consider the following factors:
| Hardware Compatibility | Software Compatibility |
|---|---|
|
|
By performing these compatibility checks, you can ensure that your new GPU is a perfect fit for your system. This will prevent any potential issues and ensure optimal performance.
Benefits Of Uninstalling Graphics Drivers
Uninstalling graphics drivers before installing a new GPU offers several benefits. It ensures compatibility and prevents conflicts, improving overall system performance. Additionally, it allows for a clean installation of the latest drivers, unlocking the full potential of the new graphics card.
Improved Gpu Performance
When it comes to upgrading your graphics card, few things are as crucial as ensuring the old graphics drivers are uninstalled before installing the new GPU drivers. This simple step can bring several benefits that significantly improve your overall experience. One of the primary benefits of uninstalling graphics drivers is improved GPU performance. By removing the old drivers, you remove any potential conflicts or compatibility issues with the new GPU. This allows the new drivers to communicate effectively with the hardware, maximizing its performance potential.Stability And Compatibility
Stability and compatibility are two critical aspects that can make or break your gaming or graphic-intensive tasks. By uninstalling the old graphics drivers before installing the new GPU, you can ensure a stable and compatible environment for your graphics card to operate smoothly. When you install a new GPU without uninstalling the old drivers, there is a risk of conflicting software elements. These conflicts can lead to system crashes, freezes, or performance hiccups. To ensure stability and compatibility, the old drivers must be completely removed. This ensures that your new GPU and its drivers have a clean and uninterrupted pathway to function optimally. In addition, different graphics cards have unique software requirements and configurations. Uninstalling the old graphics drivers ensures that any remnants of the previous card’s configuration are eliminated, minimizing the chances of compatibility issues with the new GPU. Uninstalling graphics drivers might seem like an unnecessary step, but the benefits it brings are well worth the effort. Improved GPU performance ensures that you get the most out of your new graphics card, while stability and compatibility provide a hassle-free experience. So, next time you upgrade your GPU, make sure to uninstall the old graphics drivers before installing the new one for a seamless and optimized experience.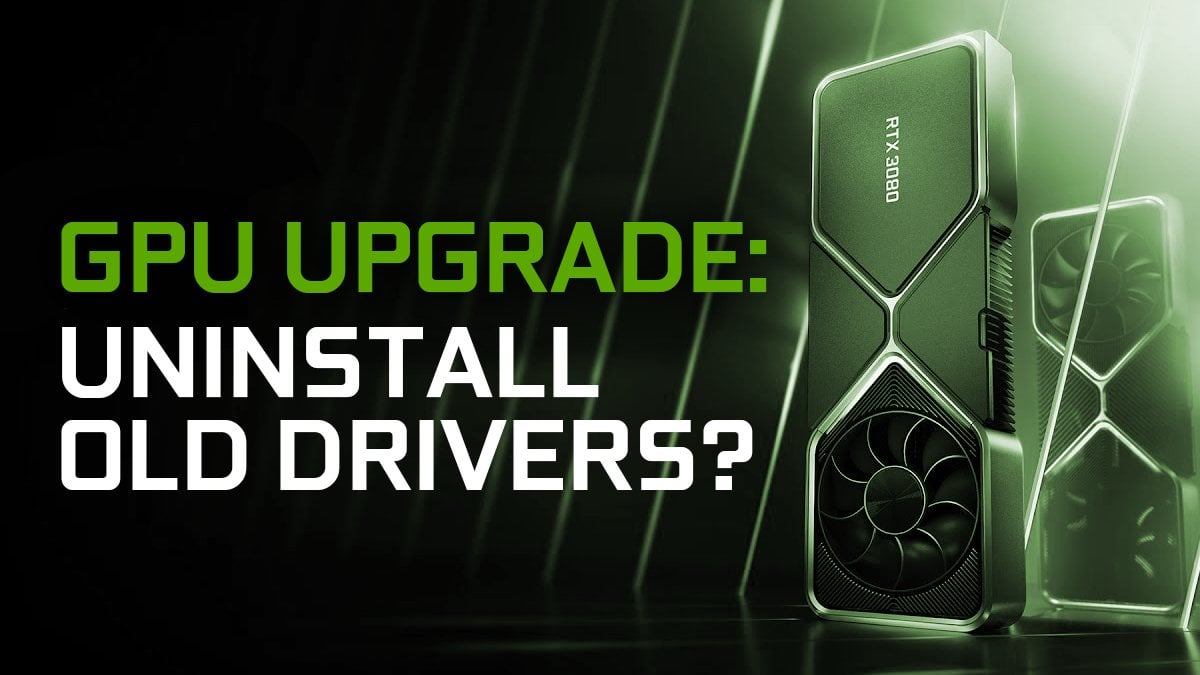
Credit: www.cgdirector.com

Credit: www.cgdirector.com
Frequently Asked Questions For Uninstall Graphics Drivers Before Installing New Gpu
Should I Uninstall My Current Graphics Drivers Before Installing A New Gpu?
Yes, it is recommended to uninstall your current graphics drivers before installing a new GPU. This ensures a clean installation and prevents any potential conflicts or compatibility issues between the old and new drivers.
What Happens If I Don’t Uninstall My Current Graphics Drivers Before Installing A New Gpu?
If you don’t uninstall your current graphics drivers before installing a new GPU, it can lead to driver conflicts and compatibility issues. This may result in system crashes, poor performance, or even prevent your new GPU from functioning properly.
How Do I Uninstall My Current Graphics Drivers?
To uninstall your current graphics drivers, simply go to the Control Panel or Settings, open the Device Manager, locate your graphics card under the Display adapters section, right-click on it, and select Uninstall. Follow the on-screen prompts to complete the uninstallation process.
Can I Update My Graphics Drivers Instead Of Uninstalling Them?
While updating your graphics drivers is generally recommended, it is still advisable to uninstall your current drivers before installing a new GPU. This ensures a clean installation and minimizes the risk of any conflicts or compatibility issues between the old and new drivers.
Conclusion
Before installing a new GPU, it’s crucial to uninstall the existing graphics drivers. This step ensures optimal performance and compatibility with the new hardware. By following this simple process, you can avoid potential conflicts, glitches, or error messages. Remember to download the latest drivers from the manufacturer’s website before installation.
Taking the time to properly uninstall and update graphics drivers will ensure a smooth transition and enhance your overall gaming or graphic experience.