If your hard drive is not showing up in the boot priority on Windows 10, you can resolve the issue by accessing the BIOS settings and ensuring that the hard drive is properly detected and listed in the boot order. You can do this by restarting your computer and pressing the designated key to enter the BIOS setup, then navigating to the boot priority settings to check if the hard drive is recognized.
Having your hard drive not showing up in the boot priority on Windows 10 can be frustrating, but it’s a common problem that can be fixed with a few simple steps. We’ll discuss how to troubleshoot and resolve this issue, so you can get your system up and running smoothly.
We’ll cover the common causes of this problem and provide step-by-step instructions to help you address it effectively. By the end of this guide, you should have a clear understanding of how to resolve the issue and ensure your hard drive appears in the boot priority on Windows 10.
:max_bytes(150000):strip_icc()/change-the-boot-order-in-bios-2624528-13c3bd01c02c4a669b03c72b4d1793fd.png)
Credit: www.lifewire.com
Checking The Physical Connections
When your hard drive does not show up in the boot priority on Windows 10, it can be a frustrating experience, hindering your ability to start up your computer. One of the common reasons for this issue could be physical connections that are not properly set up. In this section, we will walk through the steps to check the physical connections of your hard drive. Let’s start with checking the SATA cable and inspecting the power supply.
Checking The Sata Cable
Before proceeding, ensure that your computer is turned off and unplugged to avoid any electrical mishaps. Here’s a quick step-by-step guide to check the SATA cable:
- Locate the SATA cable connected to your hard drive and motherboard.
- Ensure that the cable is securely connected to both the hard drive and the motherboard.
- If it appears loose, firmly reattach the SATA cable to both the hard drive and motherboard, making sure it is properly seated.
- Double-check that the SATA power cable from the power supply unit is also securely connected to the hard drive.
Inspecting Power Supply
Next, let’s move on to inspecting the power supply to ensure it is providing adequate power to the hard drive. Follow these steps:
- Open your computer’s case and locate the power supply unit.
- Ensure that the power supply unit is firmly plugged into the wall outlet and switched on.
- Check the connections from the power supply unit to the hard drive and motherboard, making sure they are secure.
- If the power supply unit has multiple connectors, try using a different connector to power the hard drive.
Updating Bios
Updating the BIOS firmware of your Windows 10 computer can resolve issues where the hard drive is not showing up in the boot priority. This process involves entering the BIOS settings and performing the necessary updates to the system firmware.
Entering Bios Settings
To enter the BIOS settings, you need to restart your computer and press a specific key (usually Del, F2, F12, or Esc) during the boot process to access the BIOS menu. Once you’re in the BIOS settings, navigate to the “Advanced” or “Boot” tab to locate the boot priority options.
Updating Bios Firmware
After accessing the BIOS settings, check for the current version of the BIOS firmware. You can then visit the manufacturer’s website to download the latest BIOS update for your specific motherboard model. Follow the provided instructions to update the BIOS firmware, ensuring that you carefully adhere to all guidelines to avoid any potential issues.
Upon completing the BIOS firmware update, restart your computer and re-enter the BIOS settings to confirm that the hard drive is now visible in the boot priority options.
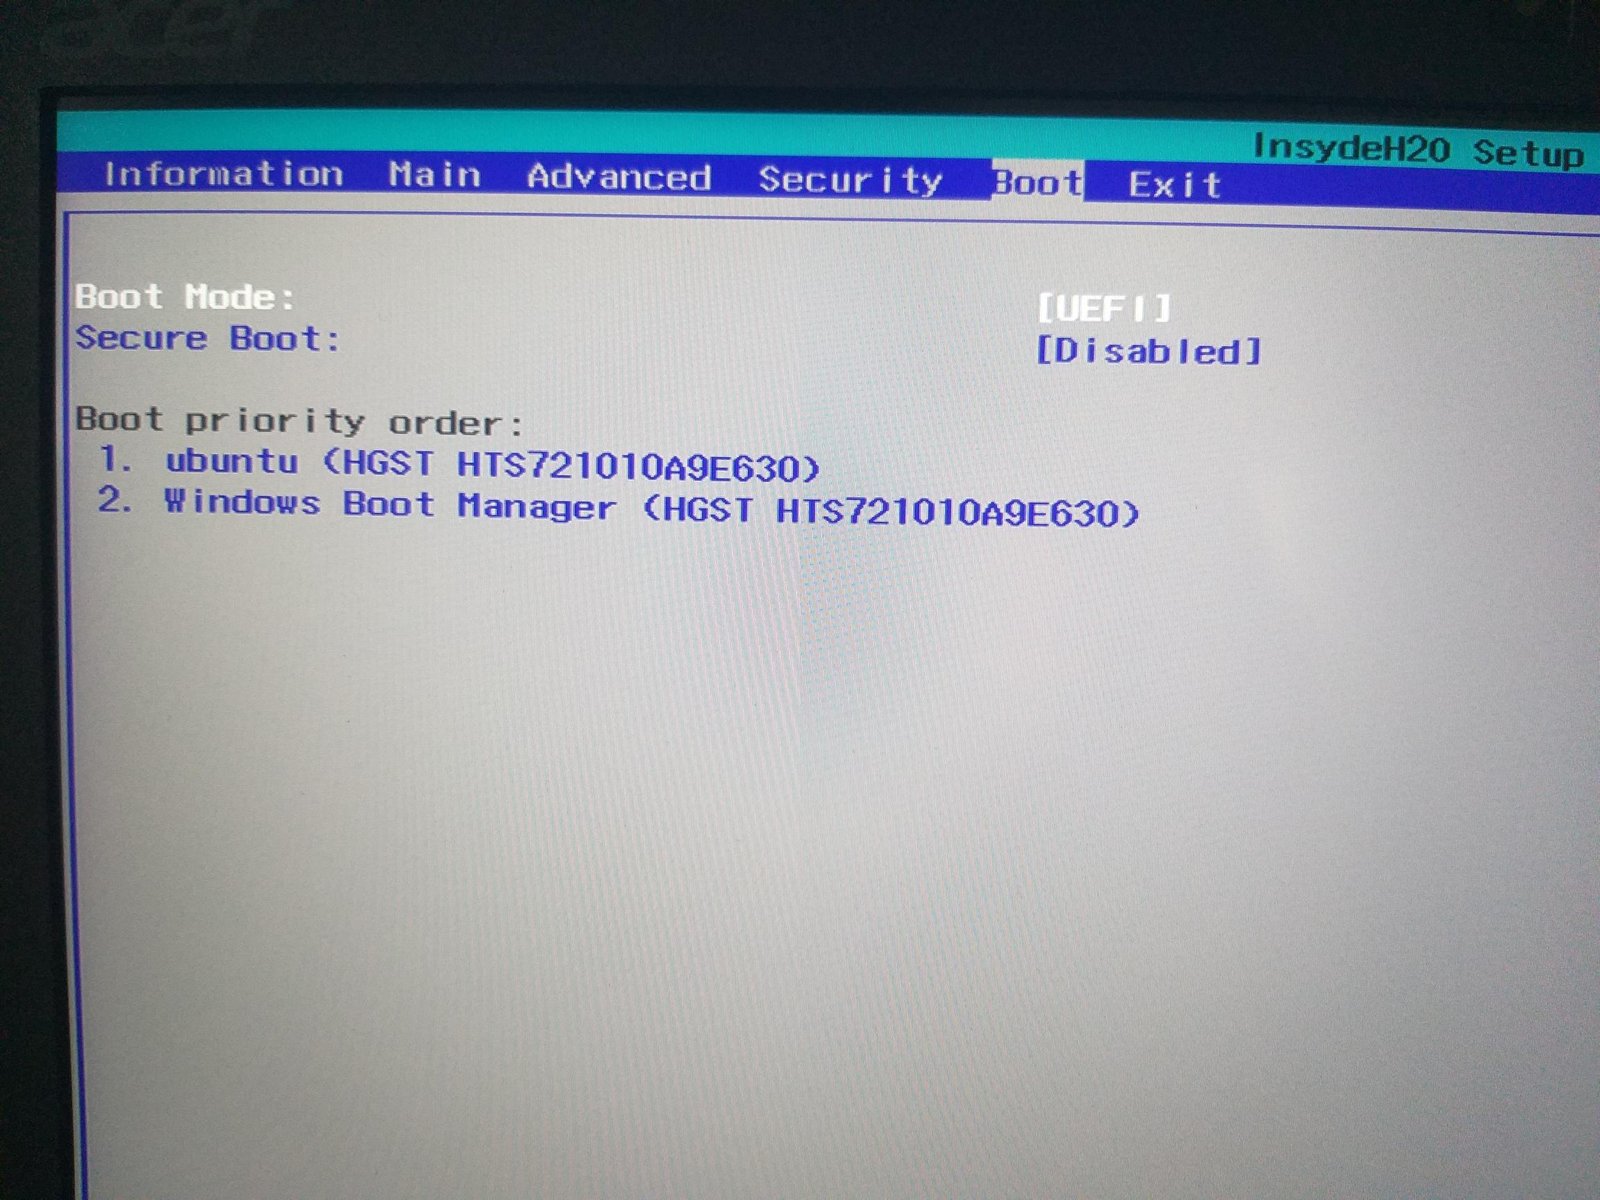
Adjusting Boot Priority
If your hard drive is not showing up in boot priority on Windows 10, you may need to adjust your boot priority settings. This can be done by accessing the boot priority settings and changing the boot order.
Accessing Boot Priority Settings
To access the boot priority settings on your Windows 10 computer, follow these steps:
- Start your computer and press the Del or F2 key repeatedly until the BIOS setup utility screen appears. This key may vary depending on your computer’s manufacturer, so refer to your user manual if you are unsure.
- Once the BIOS setup utility screen is displayed, navigate to the Boot tab using the arrow keys on your keyboard.
- Look for the Boot Priority or Boot Order option and select it.
Changing Boot Order
To change the boot order, follow these steps:
- Using the arrow keys, highlight the desired boot device (usually the hard drive that is not showing up) in the boot priority list.
- Move the selected boot device up or down the list by pressing the + or – key, respectively. Ensure that the desired boot device is placed at the top of the list.
- Press the F10 key to save the changes and exit the BIOS setup utility.
- Restart your computer and check if the hard drive is now showing up in the boot priority.
Adjusting the boot priority settings can help ensure that your hard drive is recognized as a bootable device by your computer. By following these steps, you should be able to resolve the issue of your hard drive not showing up in the boot priority on Windows 10.

Credit: www.reddit.com
Rescanning For Hardware Changes
If you’ve encountered the frustrating issue of your hard drive not showing up in the boot priority on Windows 10, don’t worry, there are solutions available. One way to tackle this problem is by rescanning for hardware changes. This method can help detect any new devices connected to your computer and prompt Windows to recognize them properly. In this section, we’ll guide you through the process of rescanning for hardware changes using both the Device Manager and scanning for hardware changes function in Windows 10.
Using Device Manager
To start, we’ll explore the Device Manager, which is a powerful tool that allows you to manage all the hardware devices connected to your computer. Follow the steps below to rescan for hardware changes:
- Press the Windows key + X on your keyboard to open the Power User menu. From the menu that appears, select Device Manager.
- In the Device Manager window, locate the category that corresponds to the missing hard drive. It is usually found under the Disk drives or Storage controllers section.
- Right-click on the category and select Scan for hardware changes from the context menu.
- Wait for the scanning process to complete. Windows will now search for any new hardware devices connected to your computer and attempt to install the necessary drivers for them.
- Once the process is finished, check if the missing hard drive is now visible in the boot priority list.
Scanning For Hardware Changes
If you prefer a more direct route, you can use the scanning for hardware changes function in Windows 10. Here’s how:
- Press the Windows key + X to open the Power User menu. From the list, select Device Manager to open it.
- In the Device Manager window, click on the Action tab located at the top.
- From the dropdown menu, select Scan for hardware changes.
- Windows will now initiate the scanning process, searching for any new hardware devices connected to your computer. Wait for the process to complete.
- After the scanning is done, check if the missing hard drive appears in the boot priority list.
Rescanning for hardware changes can often resolve issues where a hard drive fails to show up in the boot priority on Windows 10. Whether you choose to use the Device Manager or scan for hardware changes directly, these steps should help you troubleshoot the problem and get your hard drive recognized by your computer once again.
Performing A Clean Install Of Windows
If you are facing the issue of a hard drive not showing up in the boot priority on Windows 10, performing a clean install of Windows can help resolve the problem. This process involves creating a Windows installation media and then installing Windows on the hard drive. Follow the steps below to perform a clean install of Windows.
Creating A Windows Installation Media
- First, you need to create a Windows installation media to boot your computer from. This can be done by using a USB drive or DVD.
- Insert the USB drive or DVD into your computer and open the Windows Media Creation Tool.
- Follow the instructions in the tool to select the Windows version and language you want to install. Make sure to choose the correct architecture (32-bit or 64-bit) based on your system.
- Select the option to create installation media for another PC and choose the USB drive or DVD as the location to save the files.
- Click on the “Next” button and wait for the tool to download the necessary files and create the installation media.
Installing Windows On The Hard Drive
- Once you have created the Windows installation media, restart your computer and boot from the USB drive or DVD. You may need to change the boot order in the BIOS settings to prioritize the USB drive or DVD.
- When the Windows setup screen appears, select your language preferences and click on the “Next” button.
- Click on the “Install now” button to start the installation process.
- Follow the on-screen instructions to select the installation type and choose the hard drive where you want to install Windows.
- Click on the “Next” button to begin the installation process. The Windows setup will format the selected hard drive and install a fresh copy of Windows.
- Wait for the installation to complete, and then follow the prompts to set up your computer and personalize your settings.
Performing a clean install of Windows can fix various issues, including the problem of a hard drive not showing up in the boot priority. By following the steps mentioned above, you can easily create a Windows installation media and install Windows on your hard drive. Remember to back up your important files before performing a clean install, as it will erase all the data on the selected hard drive.

Credit: www.reddit.com
Frequently Asked Questions On Hard Drive Not Showing Up In Boot Priority On Windows 10
Q: Why Is My Hard Drive Not Showing Up In Boot Priority On Windows 10?
A: There could be several reasons for this issue, such as incorrect BIOS settings, faulty cables, outdated drivers, or a disconnected hard drive. Ensure that your hard drive is properly connected, check BIOS settings, update drivers, or seek professional help if needed.
Q: How Can I Fix The Issue Of My Hard Drive Not Showing Up In The Boot Priority?
A: To fix this issue, start by checking the connections and cables of your hard drive. If they are fine, access the BIOS settings and ensure that the hard drive is enabled and set as the primary boot device. If the issue persists, update your drivers or consult an expert for assistance.
Q: What Should I Do If My Hard Drive Is Not Recognized By Windows 10 During Boot?
A: If your hard drive is not recognized during boot on Windows 10, try reseating the cables connecting the hard drive to the motherboard. If that doesn’t work, access the BIOS settings and check if the hard drive is detected.
You may also need to update your BIOS or install necessary drivers.
Conclusion
To summarize, troubleshooting a hard drive not appearing in boot priority on Windows 10 can be a frustrating experience. However, by following the step-by-step methods discussed in this blog post, you can diagnose and resolve the issue efficiently. Remember to check the hardware connections, update the BIOS, adjust boot settings, and ensure drivers are up to date.
With patience and persistence, you can successfully overcome this hurdle and get your hard drive recognized in the boot priority settings, ensuring a smooth and seamless computing experience.