To enable or disable UAC on Windows 11, go to the Control Panel, select “User Accounts,” then “Change User Account Control settings.” Windows 11 offers a user-friendly interface to manage UAC settings, providing more control over system security.
UAC, or User Account Control, is a security feature in Windows 11 that helps prevent unauthorized changes to your system. By default, UAC prompts for user consent when a program tries to make changes to your computer. However, some users may find these prompts disruptive and may want to either disable UAC to avoid them altogether or customize the level of notification they receive.
We’ll guide you on how to easily enable or disable UAC on Windows 11 to suit your preferences.
Credit: www.howtogeek.com
Why Uac On Windows 11?
Enabling or disabling User Account Control (UAC) on Windows 11 can play a crucial role in enhancing your system’s security and controlling system changes. Before delving into how to enable or disable UAC on Windows 11, it’s important to understand why UAC is significant for the overall security and stability of your system.
Enhancing Security
User Account Control (UAC) serves as a vital safeguard against unauthorized changes to your system settings and applications. When UAC is enabled, Windows prompts for consent or authentication before allowing any applications or system-wide changes to occur, which helps prevent unauthorized access and software modifications that could potentially compromise your system security. This extra layer of protection is essential in thwarting malicious activities and ensuring the integrity of your system.
Controlling System Changes
UAC on Windows 11 provides a granular level of control over system changes by alerting users when potential modifications are about to be made, giving them the opportunity to approve or deny the action. This feature mitigates the risks associated with unauthorized tampering of system settings, providing users with the means to manage and oversee any changes being made to their system, thereby fostering a more secure computing environment.
Credit: clockify.me
Understanding Uac On Windows 11
What Is Uac?
UAC, or User Account Control, is a feature in Windows 11 designed to prevent unauthorized changes to your computer.
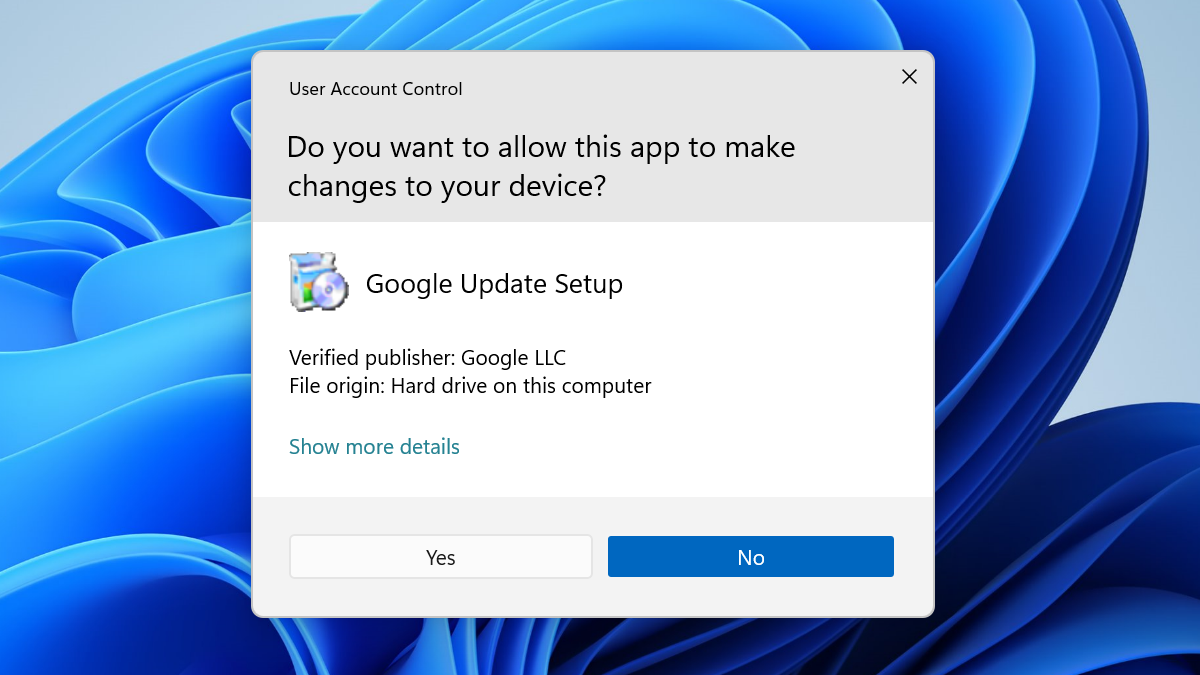
How Does Uac Work?
When a program attempts to make changes to your computer, UAC notifies you and asks for permission, prompting an administrator to enter their password or click “Yes” to authorize the action.
Levels Of Uac
Windows 11 offers four levels of UAC, ranging from never notify to always notify, allowing you to customize the level of security prompts based on your preferences.
Enabling Uac On Windows 11
Enabling the User Account Control (UAC) feature on Windows 11 can help enhance the security of your system by providing an additional layer of protection against unauthorized changes and potentially harmful software. UAC prompts you for permission whenever a program tries to make changes to your computer that could affect system settings or data. By enabling UAC, you can maintain greater control over your system’s security and prevent unauthorized access.
Step 1: Accessing Uac Settings
Accessing the UAC settings on Windows 11 is a straightforward process. Follow these simple steps:
- Click on the Start button located in the bottom left corner of your screen.
- In the Start menu, click on the Settings icon, represented by a gear-shaped symbol.
- In the Settings window, select the System category.
- In the left-hand sidebar, choose About.
- Scroll down to the Related settings section and click on System info.
- In the System window, click on the Advanced system settings link on the left.
- This will open the System Properties dialog box. Switch to the System Protection tab.
- Click on the Settings button located in the Performance section.
- Finally, in the Performance Options dialog box that opens, navigate to the Data Execution Prevention tab.
Step 2: Adjusting Uac Level
Now that you have accessed the UAC settings, you can easily adjust the level to fit your preferences. Follow these steps:
- When in the Performance Options dialog box’s Data Execution Prevention tab, locate the Enable UAC checkbox.
- Check the box to enable UAC. This ensures UAC is active and prompts you for permission.
- If you wish to adjust the UAC level, click on the Change Settings button.
- Slide the adjustment bar up or down to set your desired level. Higher settings provide more security, while lower settings offer more convenience.
- Once you have selected your preferred level, click on OK to save the changes.
- Restart your computer to apply the new UAC settings.
Enabling UAC on Windows 11 is a crucial step in securing your system and protecting against potential threats. By following these simple steps, you can easily enable UAC and personalize the level of security that suits your needs.
Credit: www.quora.com
Disabling Uac On Windows 11
Windows 11 comes with a built-in security feature called User Account Control (UAC) that helps protect your computer from potentially harmful software. While UAC is designed to be helpful, it can sometimes be a bit too intrusive, and you may find yourself wanting to disable it. In this guide, we will walk you through the steps to disable UAC on Windows 11.
Step 1: Accessing Uac Settings
To disable UAC on Windows 11, you will first need to access the UAC settings. Here’s how you can do it:
- Click on the Start button in the bottom-left corner of your screen.
- In the search bar, type
Control Paneland click on the corresponding result. - In the Control Panel window, click on the User Accounts option.
- Next, click on the Change User Account Control settings link.
Step 2: Turning Off Uac
Once you have accessed the UAC settings, you can now proceed to turn off UAC. Here are the steps to follow:
- In the User Account Control Settings window, you will see a slider with different levels of UAC.
- Drag the slider to the bottom position, which corresponds to Never notify.
- Click on the OK button to save the changes.
- You will then be prompted to restart your computer for the changes to take effect. Click on Yes.
After restarting your computer, UAC will be disabled on Windows 11, and you will no longer receive notifications when making system changes. Please note that disabling UAC can make your computer more vulnerable to certain security risks, so it is important to exercise caution and only disable it if you fully understand the implications.
Best Practices For Uac On Windows 11
In this blog post, we will explore the best practices for User Account Control (UAC) on Windows 11. UAC is an essential security feature that helps prevent unauthorized changes to your computer’s settings and protects it from potentially harmful software. By understanding how to use UAC wisely, manage UAC prompts effectively, and create exceptions when necessary, you can ensure a secure and smooth user experience on Windows 11.
Using Uac Wisely
When it comes to utilizing User Account Control (UAC) on Windows 11, it is essential to understand how to use it wisely. Here are some best practices to follow:
- Keep the UAC setting enabled at the recommended level to maintain the maximum level of security.
- Avoid disabling UAC completely, as it leaves your system vulnerable to unauthorized changes.
- Ensure all user accounts have strong passwords to prevent unauthorized users from bypassing UAC prompts.
- Regularly update your operating system and applications to patch security vulnerabilities and minimize the chances of encountering malicious software.
Managing Uac Prompts
Managing User Account Control (UAC) prompts effectively on Windows 11 can help maintain a secure and hassle-free user experience. Consider the following tips:
- When a UAC prompt appears, review the action that triggered it before proceeding. If you initiated the action or trust the application, click “Yes” to allow the changes.
- If you receive UAC prompts frequently, you can adjust the UAC notification level to display notifications less frequently. However, exercise caution with this setting, as it may compromise your system’s security.
- If you consistently encounter UAC prompts for a particular application, you can create an exception by following specific steps. We will discuss creating UAC exceptions in the next section.
- Consider running applications with elevated privileges when necessary, but be cautious as it can expose your system to potential risks.
Creating Uac Exceptions
Creating UAC exceptions can help minimize the number of User Account Control (UAC) prompts you encounter for trusted applications or specific actions. Here’s how to do it:
- Open the Control Panel and navigate to the User Accounts section.
- Click on “User Account Control settings” and adjust the UAC slider to the desired level.
- To create an exception, click on “Change User Account Control settings.”
- Under the “User Account Control Settings” window, click on “Yes” when prompted by UAC.
- Select the desired program/application that you want to create an exception for and click “OK”.
- Verify the changes by running the application and observing whether UAC prompts appear.
Frequently Asked Questions Of Enable Or Disable Uac On Windows 11
How Do I Enable Uac On Windows 11?
To enable User Account Control (UAC) on Windows 11, go to Settings, select System, click on Security & Privacy, then choose Windows Security. From there, click on User Account Control and slide the toggle button to the On position.
How Do I Disable Uac On Windows 11?
To disable User Account Control (UAC) on Windows 11, navigate to Settings, select System, click on Security & Privacy, then choose Windows Security. Next, click on User Account Control and slide the toggle button to the Off position.
What Is Uac On Windows 11?
UAC stands for User Account Control, and it is a security feature on Windows 11 that helps prevent unauthorized changes to your computer. It works by notifying you when a program tries to make changes that require administrative rights, giving you the option to permit or deny the action.
Should I Enable Uac On Windows 11?
Enabling User Account Control (UAC) on Windows 11 is recommended as it adds an extra layer of security to your computer. UAC helps protect against unauthorized changes, malware, and other potentially harmful actions. Keeping UAC enabled ensures that you have more control over what changes are made to your system.
Conclusion
To sum up, enabling or disabling User Account Control (UAC) on Windows 11 can greatly impact the overall security and user experience of your system. By understanding the purpose and potential benefits of UAC, you can make an informed decision that aligns with your specific needs and preferences.
Whether you choose to enable or disable UAC, it is crucial to maintain a balanced approach and take necessary precautions to safeguard your device. With the right settings in place, you can optimize your Windows 11 experience without compromising on security.